Posts

Showing posts from February, 2021

Destroy the Icon Progress 02

Image
 I began to experiment with blending layers of lily pads and aquatic themes into my work, this is one of the variations I decided against using: These are a few interesting blended layers I was playing with as well:  I decided to use the "color dodge" blended image. 

Destroy the Icon Progress 01

Image
 I have decided to choose the iconic photo "Afghan Girl" for this project!  This is the first image I chose to blend/incorporate into the iconic photo: I used content aware fill to make up for the empty spaces, and blended the cloud photo into the Afghan girl photo using "Lighten" to create this:  

Fantasy Appliance

Image
 

Fantasy Appliance Progress 05

Image
 After adjusting the blender/background, I decided there was too much empty space in the top section of the background, so I added clouds. I started with my original "shades of grey" clouds layer, and then pulled sections of clouds from that original image (copied into a different layer) to add in the layers above the blender. I adjusted the opacity varying from 30%-50% to give it a "cloudy" transparency, and then added the steam from the "boiling water" (shades of grey) image. I adjusted the opacity of the steam to 50%, removed some of the darker shapes from the base and adjusted any additional dark colors to be lighter to make my object appear more cohesive. After making the images seen above, I chose to pull the steam straight up into the sky (touching the top of the artboard.) 

Fantasy Appliance Progress 04

Image
  In these images, I took the originally outlined base and added gradient fills to the inside. I then added the vectorized water image to a background layer, where I repositioned all of my shapes/objects. (As you can see, I forgot to make the water layer greyscale; I corrected this in the next few steps.) I decided to put the blender in the center of the image to make it appear as though it was sucking water up into the blender from the bottom.  After deciding I wanted to have some kind of substance coming out of the top of the blender, I removed the lid layer and added it to the water. I found that setting it on top made my work look flat; so I set the lid at an angle, and erased half of it to make it appear as though it has been thrown in the water and is sinking. From here I then added another gradient fill to the top portion of the blender and on the handle (playing with transparency); as well as the button in the middle. I additionally added a curved shape to the base of the blend

Fantasy Appliance Progress 03

Image
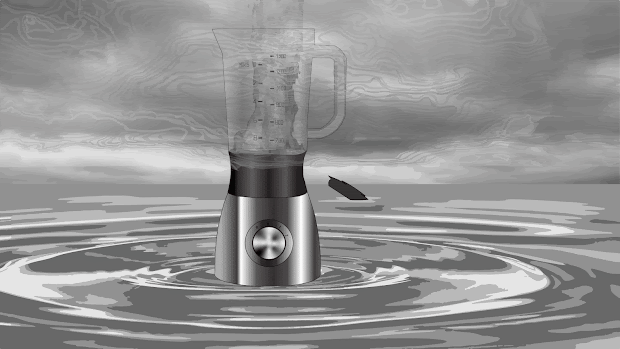
 I took screenshots as I worked to be able to go back into the blog to document my progress/progress; These were the external (unedited) images I chose to vector to be used for the background, foreground and inside the blender.  Here are the images after I image traced them: I used "shades of grey" on the pot of boiling water and the cloudy sky, and "4 colors" on the water image. I adjusted the water image to fit the artboard with the blender in it, positioning the blender into the center of the water rippling effect. The clouds I added to the background (above the layer with the water), before I selected various sections of the clouds, layering it on top of the blender layers (adjusting the opacity to around 30%-50% per layer.) I additionally pulled the steam from the boiling water image, and inserted it inside the blender to give it the appearance that steam was coming out of it. I deleted some of the darker layers in the steam, and changed the color of the base l

Fantasy Appliance Progress 02

Image
This is the outline of the blender; I am regretting not compartmentalizing the different sections into layers so that I can fill colors and add gradients as needed. Will be asking advice from the class on what to do!  

Fantasy Appliance Progress 01

Image
The appliance I have been working on digitalizing is a blender; this is the photo I am using for reference.